Sunday, 21 October 2012

Elizabethan Era

My research for the clothing of 16th century England started by looking at the Tudors and Elizabethans, and sites about them:


the-tudors.org.uk
elizabethan-era.org.uk


Tudor Clothes for Poor Men

The Sumptuary Laws were designed to limit the expenditure of Tudor people on clothes and to maintain the social structure of the Tudor Class system! Wool, linen and sheepskin were the most inexpensive materials and fabrics to produce and therefore limited to low status clothing of Poor Tudor men. In 1571 a law was passed which decreed that everyone over the age of 6 years old had to wear a woollen cap on Sundays and on holidays in order to help England's wool trade, of course, royalty and the nobility were excused from obeying this law. Another interesting fact is the taller the hat the more important the man - poor men wore woollen flat caps. The following table lists the Tudor clothes for Poor men as dictated by the Sumptuary Laws or Statutes of Apparel.


This website also gave a list of colours poor people could wear: Browns, beige, yellow, orange, russet, green, grey and blue (but the deep Poor indigo but dyed with woad.)

Elizabethan Village Life

 Elizabethan Village Life was extremely insular as their village provided the majority of requirements to be self-sufficient. 
The village houses consisted of half - timbered buildings with thatched roofs and were surrounded by countryside and woodlands. 

After a visit to the Forum Library, I found many useful books on Elizabethan clothing and lifestyle.


Daily Life in Elizabethan England 

written by Jeffrey L. Singman, 1995

Chapter 5: The Living Environment.


"The houses of country folk were based on jointed frames of oak: instead if nails, which would be too weak, the timbers were carved with tongues (tenons) and slots (mortices) so that the whole frame would fit together, with the tenons secured in their mortices by thick wooden pegs. Ideally the frame would rest on a stone foundation, since prolonged contact with moisture in the ground would eventually cause the timbers to rot. However, the cheapest sorts of structures simply had their main posts sunk into the ground."


Clothing


Other

In the chapter entitled "entertainment" were a number of songs that have survived from the Elizabethan era. I could use these as bases of any tunes or music I have for my animatic.


Elizabethan England
written by A.H. Dodd, 1974.


Other books


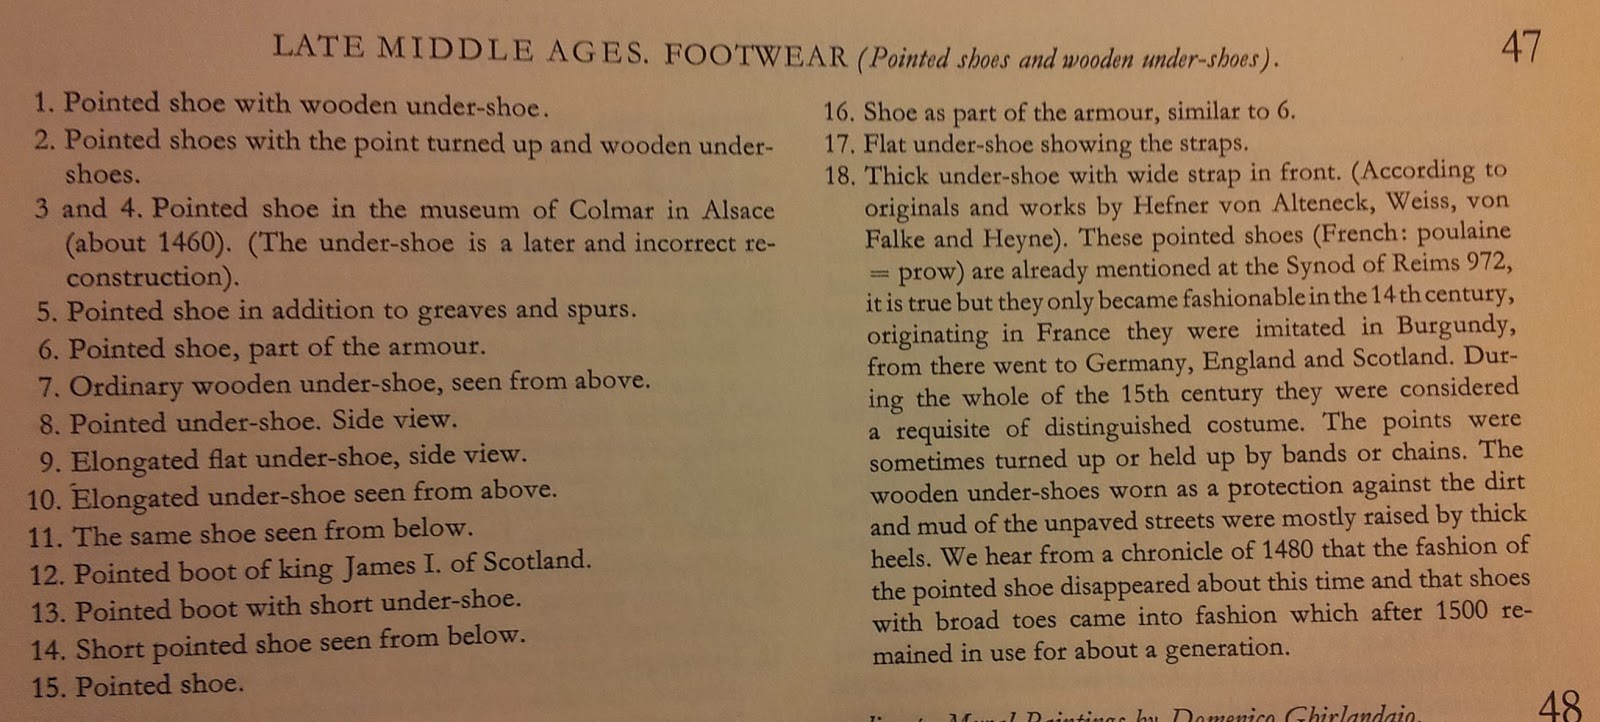
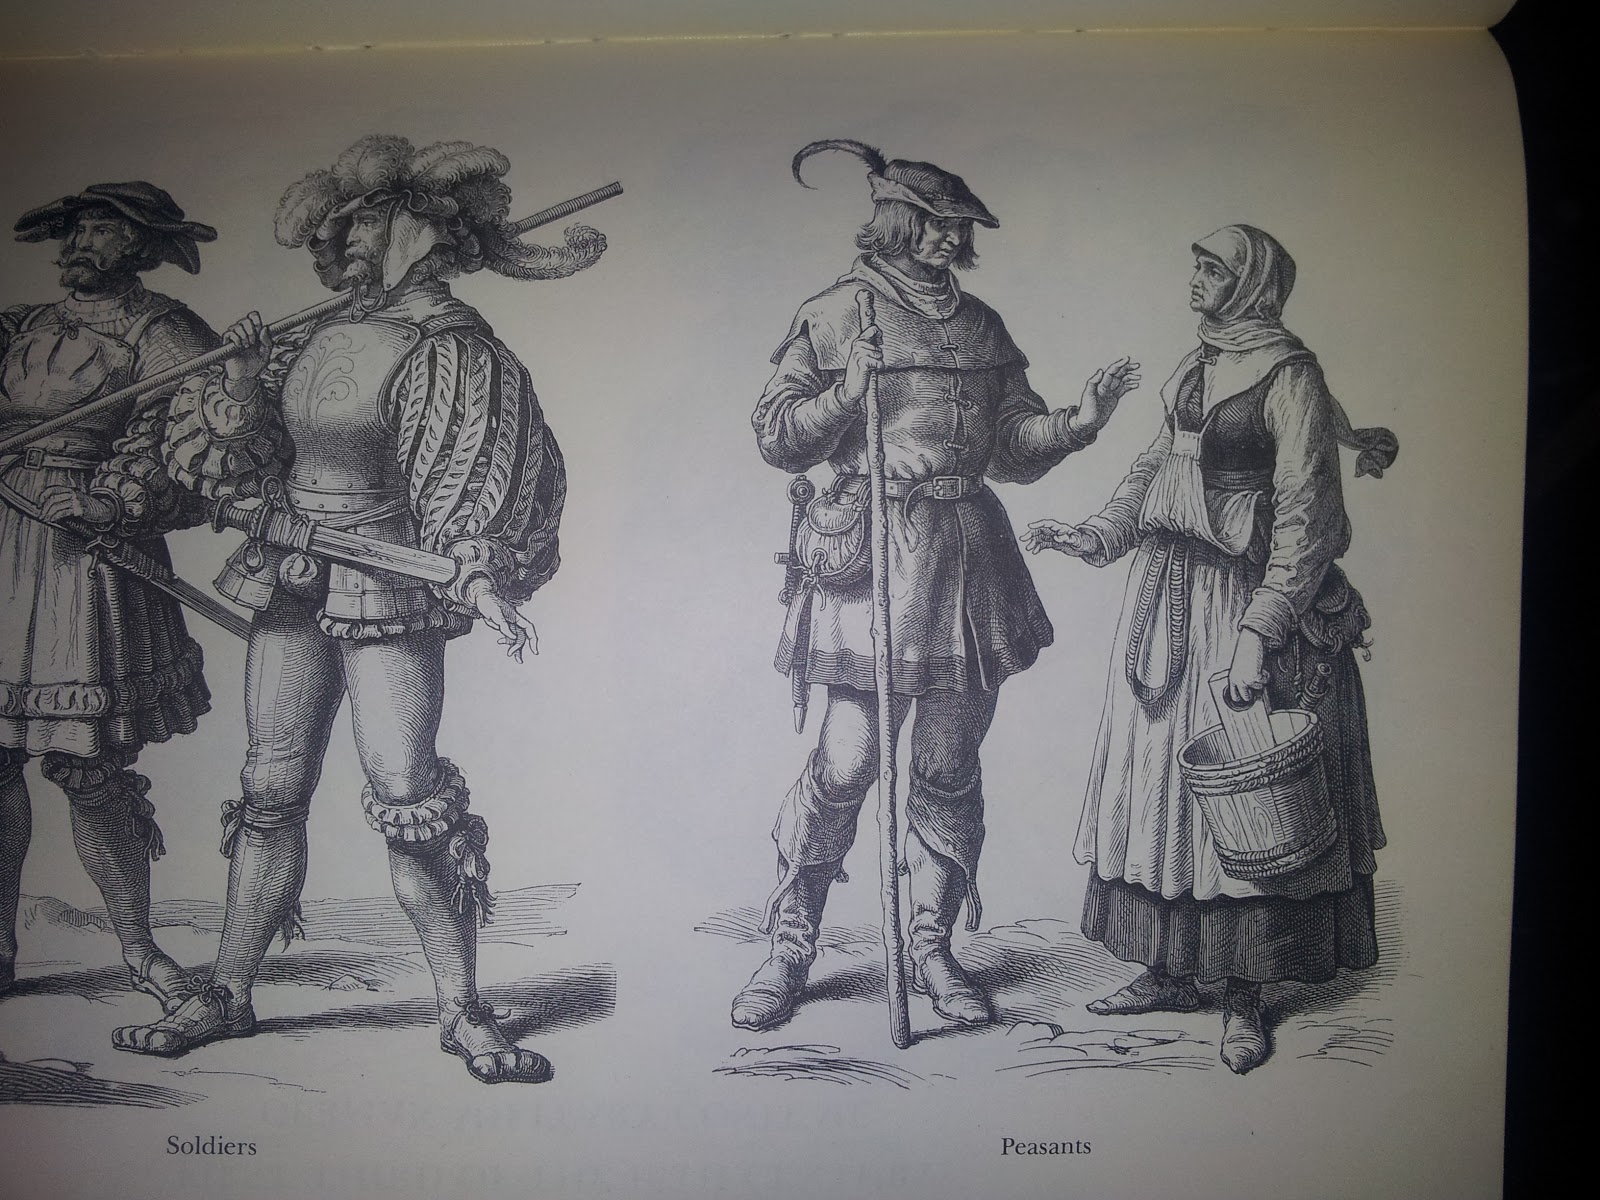
Braun and Schneider (1975) Historic Costume In Pictures. First ed. Dover Publications, New York

These are some images taken from Braun and Schneider's Historic Costume In Pictures book that displays illustrations of dress from different time periods all over the world.


Learning After Effects

Already I have discovered using After Effects is not going to be as easy as I first thought. I know my animation will be simple, and so I thought the basics I learnt in second year would be enough, but in my attempts at making a very short animation this morning proved I need to re learn the basics as well as some other effects like parenting.

I made some very quick, rough images on photoshop of my toy theatre setting and imported these images into After Effects. I had remembered all the basic transform tools such as position and scale and managed to create this.


This is very poor, but I have learned that I just need to manage my timing better, and this has taught me that I will need to give myself plenty of time to put the animation together
There are many things I would still need to play around with, such as the timing and smoothness of the transitions, but this was just a quick exercise to see what I had remembered.

After recapping the basics on Lynda (a software training and tutorial video library) I am confident in my capability to use After Effects for what I need, which will mainly the basics. These include the transform tools: Anchor Point, Position, Scale, Rotation, and Opacity. These are all I will need to create my motion graphic, although I am using After Effects, the animation is not my main focus, instead I am using simple animations to portray my artwork in a more visually interesting way. I have created a basic tutorial for myself with all the information I will need to know:

Setting up:
First we must set up a new project, we do this by opening After Effects and select File > New Project.


Once we have our new project, we need to create a Composition, a Composition is the framework for a movie, each has its own timeline and sources (such as images, videos, and audio). Simple projects may have just one composition, more complex projects may have hundreds. My project will have a number of different compositions, each one for a different image. To start a new compostion we can selecet New Composition from the Composition bar, or select New Composition from the Welcome Screen when opening After Effects.


Here we have the option to set up our new composition (also reffered to as "comp"), most importantly is to name our composition, and it is a good idea to name this with version1,or 001 for example at the end, so we can save multiple versions and revert back to an older stage if necessary. There are a lot of things we can change about the composition at this stage, but I am just focusing on the Basics. Next we can change the video format, named here as "Preset". I will use a 720p resolution size because this is the standard resolution for most monitors.
http://electronics.howstuffworks.com/hdtv2.htm

This image shows how resolution sizes have changed and we now have that "extra image", yet I will keep this in mind when creating my motion graphic, that anything important stays inside that original resolution area incase it is seen on a screen with a different resolution. I will use the guide lines in Adobe Photoshop (which is where I will be creating my illustrations) to ensure everything important is seen within those guidelines. 


The Preset I will use is will be HDV/HDTV 720 29.97 because 720x1280 is the standard. However, it is possible to change the width and heigh if necessary. In this window we can also change the frame rate, I will use 29.97 because it is becoming the norm, as all blue rays use this frame rate, yet 25fps (frames per second) used to be the norm. The final thing I will need to change on this composition will be its timescale, here, 0;00:10;00 is equal to ten seconds.

Next I import the photoshop file that has my first scene. When I created this image in photoshop, I made sure the keep everything that will be animated on a separate layer so I can animate each image individually. When importing the photoshop file, it is important to change the "Import as:" to Composition - Retain Layer Size, to ensure that all my work remains the same scale as I intended. Also make sure Photoshop Sequence is not ticked.  

Once imported, a file containing all of my layers from this photoshop file will appear in the left frame in the project panel. Then it is a simple matter of bringing each image into the composition (the main middle frame). I can rearrange the order and layers of each image in the bottom frame by clicking and dragging. Now I can begin animating. 

Anchor Point
The anchor point is used to determine from where the image will scale up/down from or what point the image will rotate around. The move the Anchor Point, select the Pan Behind Tool and the anchor point will move, instead of the position of the image which will move if you have the select tool in use. I will use this transformation effect in my motion graphic to...

Position
This is probably the main transformation technique I will use in my motion graphic, it is used to create a motion path for the image to follow in the animation, (Anchor points and some other effects use motion paths too, but it is easier to explain with Position). I will use this to create movement, bring images in and exit each scene. To use the position tool, I will place the individual image when I want it to start in the scene and set its key frame, I then change the time indicator and move the image to where I want it to end up. Once this is done, I can then edit the path, making the image move quicker or slower at different points by moving the dots, which show the position of the anchor point at each key frame, spreading these dots will give the appearance of the image moving slower, closer together, and moves faster. Moving dots that look like they are on the ends of sticks, are used to move the angle of and smooth the motion path between two keyframes, with the square representing the keyframe. This will be useful to smooth out positions and make them look less, "jolty" but in this example, it will move the curtain downwards and up again which I do not want.


Scale
Scale is used to resize objects, making them larger or smaller can be used to make things look like they're moving closer or further away from the viewer. The position of the anchor point is important when scaling an object because it effects from which point it scales up or down from.


As you can see by this example, the anchor point is set towards the bottom of the tree and so this point always stays in the same place, this would be good if I was drawing focus onto the tree hollow. I can show the importance of the anchor point positioning by comparing this to the image below. Here I have changed the anchor point towards the top of the tree, and so when I enlarge the tree, it focuses on this area and we lose the hollow as it begins to disappear off screen. These are factors I will carefully think about when creating my motion graphic.


Rotation
Similar to scale, the position of the anchor point is also important when rotating objects as it distinguishes the point it rotates around. A good example would be, if I were to animate a hand waving, I would want the anchor point to be at the wrist, and at the elbow for an arm, I will use rotation in my motion graphic to indicate things such as branches waving in the wind.

Opacity
The Opacity transformation tool changes the visibility of an object through its transparency. I will use this in my project to fade in different objects to look like they are appearing or leaving a scene. I will also use it  the make things look like they are moving without having to animate every movement. This animation by loish shows examples  of this technique:

In this animation, the team have used the opacity tool to move between two static images to give the impression of movement. This is a very good example of how I will create my motion graphic.
http://loish.net/animation/mahaba-love-story/

I have also researched how to manipulate and transform layers in the three dimensional layer in order to create the illusion of perspective change and zooming in or out of different scenes. To do this, I watched video tutorials on Lynda that covered this topic.
To create a 3D layer, select the 3D layer tool for each layer you wish to use, this means it is possible to have both 2D and 3D layers in the same composition. 

Once the 3d tool is on, you are given more options to manipulate the object:

Position now has an extra scale that can be used to manipulate how far back the object is, known as Z position. Positive values makes the object further away, negative values brings them closer. The scale appears to change, but this is actually perspective. Depending on the z position, the layers can go behind or in front of other layers, which gives the illusion of 3D, so stacking is less important and has less control over order, unless two layers have the same z axis position. You can manually input the values for each transformation tool, or you can use the axis arrows (similar to the ones I have seen using 3D programmes such as Maya) to move the position. The blue arrow is the z axis, this changes the depth making the object appear closer and further away. Green is the y axis, moving the object up and down and the red is the x. axis, moving the object left and right. A way to remember which is which is RGB = XYZ.
Orientation is a second take of the below axis, this changes the position of the objects orientation and is better for posing, but not for animating because you cannot manipulate them separatley like you can with the rotation tools.
X rotation, rotates the object around the x horizontal axis
Y rotation, rotates the object around the y vertical axis
Z rotation, this is similar to the 2D rotation tool, and rotates the object around the z axis.
If the object overlaps with another layer behind it when it rotates, it will intersect through the layer, giving the illusion of 3D, however the objects will disappear when rotated to the point of  the exact side or top view because they have no depth. This is why this illusion of 3D is actually referred to Two and a half Dimensional.
Using these new tools I have learned I managed to create this very simple animation that shows the use of z position, \


It is important to have high resolution images if I am going to use them with perspective scaling close to the screen to create a high quality final motion graphic.


Sunday, 14 October 2012

Research list

To organise myself, I have devised a list of all the things I will need to research and a list of resources I can use for each.

Concept Art for Characters
Concept Art for Environement
Concept Art for Assets 
These will all be helpful for my research report, but also helpful for creating a process for my concept art for my studio work.
Books I will use for this:

The Art of Uncharted 2
The Art of God of War
Fable 2 Art Book
The Skilful Huntsman


16th Century Clothing
Elizabethan Era
Norfolk Witch Trials
Norfolk Wildlife and Nature
Animal Habits and Behaviour

These will be used to create my character designs and motion graphic.

Digital Art Studies:
Anatomy
Furs
Nature

Style and Influence:

Pans Labyrinth


Snow White and the Huntsman


Animation/Animatic
After Effects
Other similar styles


Starting Research

Since starting the new year and deciding my project, I have spent the past two weeks finalising what I would like to produce for BA8, what I want to write my essay on and deciding on what I am going to need to research over the next couple of months.

Within a group crit I was able to discuss my ideas and was given good feedback about things I could look at and research for the project. I have decided to set my story in the late16th/early 17th century because this is when the original story was first published. I also thought about setting it in the 19th century because this is when it was re-worked and illustrated by Randolph Caldecott in a book published in 1879. (http://en.wikipedia.org/wiki/Babes_in_the_Wood)
Mark suggested the 16th century because I could tie in and take influence from the witch hunts popular at this time which I really like the idea of, I will also visit various museums around Norwich and Norfolk to gather research. 

Last week I started gathering research by visiting the setting of my tale, Wayland Wood.

Wayland Wood is one of the largest woods in South Norfolk, and has a recorded history going back to the Domesday book. It is believed to be the site of the ‘Babes in the Wood’ legend. Oak, ash, birch, hazel and hornbeam are all present, as well as flowers such as yellow archangel, wood anemone, early purple orchid and the rare yellow star of Bethlehem. A wide variety of birds breed in the wood, including woodcock, lesser-spotted woodpecker and nuthatch

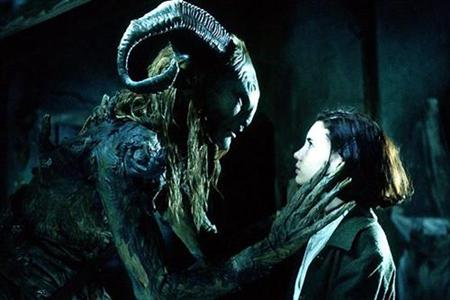
I took a few photos and plan to return again to take more with a better camera and at different times of the year. The main thing I notice about the Wood was how bright and green and full of life everything seemed, until you step off the path and head into the undergrowth and everything suddenly becomes a lot darker and spookier. This is something I want my concepts to convey, this world and story will seem fantasy like and resemble a children's fairy  tale, yet have dark undertone to it, similar to Pan's Labyrinth (2006) and Snow White and the Huntsman (2012)


Photos taken by myself at Wayland Wood on the 9th October 2012

I also visited the Norwich Castle Museum to see if I could gather any information about Norfolk in the 16th Century. Unfortunately they did not have a lot of useful information, instead the museum focus' on Boadicea, Romans, the castle itself and found objects, some of which did belong to the 16th century. However, another big part of the museum is animals and creatures from around the world with a section focused on Norfolk wildlife. This was useful in my research because it gave me a whole new range of birds and creatures I can later research and use to influence my characters.
(Insert sketches)

I also found a book called A fashionable history of Underwear by Helen Reynolds, which had a section on the 16th century. I found a few quotes that may later help in the design process of my characters.
"Slashing (clothes) was very common in the 16th century"
"The 16th century saw differences in underwear between different ranks of society. Women used underwear to change their body shape. The stiffened bodice or "body" incorporated wood, whalebone and occasionally iron bands to shape the fashionable, elongated bodice and small waste"
Although underwear of this kind probably will not matter to my characters, I want their clothing and assets to reflect the environment they live in (furs and vines etc) yet also the time they live in, and show a human side. 


Research Report
I had a few ideas of what I would like to write about for the 5000 word research report, but found it hard to settle on an idea that tied in with my studio project. While in our first contextual studies  lecture, I thought about the different styles of report and what I could study for each:

Industry Report: An Industry report on the Art Department within Lionhead studios 
(or any other studio, this would tie in with my concept art and design within the studio work)

Technical report: A technical report on using After Effects
(This would tie in with my studio work because I will be using After Effects and could tie in with a reflective report on my progress in making the animatic)

Extended Essay: An exploration of Folklore in video games.
An exploration of how nature is incorporated in some video games.
(Both would tie in with my influences for the studio work, English folklore and Nature)

Reflective Report: Improving my digital painting using reference and study.
This idea would have been more of a practical study, my idea was to create an illustration from my own head, then, using studies and reference, re create the illustration and see if it improves on the final image and if so, how it has improved.
(This would tie in with my 2D studio work)

Thinking about the animatic I wanted to produce for the studio work, I then thought about other cut scenes and cinematics used in video games and came up with the working title:

A look at the importance and influence of opening scenes/cut scenes in video games, are they necessary to the games story or a "pretty" hook to bring players in?

Within this I could discuss:
  • Personal Experience: I used to watch my brother play games like Final Fantasy 7-10 purely to see the cut scenes
  • Tie in with my opening after effects animatic scene
  • How important are cut scenes to the telling of a story or game play?
  • The relationship between the cinematic and the gameplay
  • Cinematography in Gaming
  • History of gaming cut scenes and cinematics, when were they first introduced and why
  • Are these cut scenes necessary now with the high standards of technology
I was really happy with this idea, however, soon found the subject difficult when trying to gather research. I wanted to focus mainly on the cut scene cinematic, but many games have cut scenes which are created using the game engine still. Cut scenes in video games go by many definitions such as:

noun

  • (in computer games) a scene that develops the storyline and is often shown on completion of a certain level, or when the player’s character dies:
    between every few missions there’s a lengthy cutscene which fills in the gaps in the story

    http://oxforddictionaries.com

    cutscene or event scene (sometimes in-game cinematic or in-game movie) is a sequence in a video game over which theplayer has no or only limited control, breaking up the gameplay and used to advance the plot, strengthen the main character's development, introduces enemy characters, and provide background information, atmosphere, dialogue, and clues. Cutscenes often feature on the fly rendering, using the gameplay graphics to create scripted events. Cutscenes can also be animatedlive action, orpre-rendered computer graphics streamed from a video file. Pre-made videos used in video games (either during cutscenes or during the gameplay itself) are referred to as "full motion videos" or "FMVs"


    • (Cut-Scenes) Short intermissions typically presented between stages to convey a storyline. These can be live or computer-generated videos clips, and are usually non-interactive.

    • A sequence of linear, non-interactive video that often occurs between sections of active gameplay.


    I also decided that this subject branched too far away from what I want to focus on, which is concept art, therefore I started to look at what subjects I could write about surrounding the subject of concept art. This is what I cam up with:

    An exploration of the relationship between concept art and the final in-game/film product.

    -          Discuss what Concept art is
    -          Look at concept art and compare with the final in game or film product
    -          Discuss ideas for why there is a differences
    -          Technical hold backs (Crash Bash designed brown but programme only had orange)
    -          Compare with Modern Games
    -          Look at the pipeline of a concept artist
    -          Look at the pipeline from concept art to final piece
    -          Look at the history of concept art in games
    -          Look at the history of concept art in films
    -          Do concept artists need to think about the final product, possibility to be created, will it work in game, or would this block imagination and creativity?
    -          Within the game industry pipeline, how does concept art influence the 3D work flow?